

1
Enable AI features (Admin)
Organization admins must first enable AI features for users, follow the guide
2
Create your first agent
Set up a new AI agent in your Lightdash project, follow the guide
3
Configure your agent
Use tags to control which data the agent can access, follow the guide.
4
Connect to Slack
Enable team collaboration through Slack, follow the guide
Enable AI features
Before users can see the Ask AI button and interact with AI agents, an organization admin must enable AI features. By default, AI features may not be visible to users until this step is completed.This step requires Organization Admin permissions. If you’re not an admin, ask your organization admin to enable AI features.
How to enable AI features
- Go to Settings → Ask AI → General
- Find the toggle labeled Enable AI features for users
- Turn on the toggle to make AI features visible across your organization
- The Ask AI button appears on the homepage and in the navbar
- Users can interact with AI Agents
- Admins get visibility into agent activity
Free trial available: New organizations may see a “Free trial” badge next to this toggle, allowing you to try AI features before committing to a paid plan.
Set an organization default AI model
Admins can choose the default model (and reasoning behavior) used for new AI agent chats across the organization.- Go to Organization settings → Ask AI → General.
- Under Default AI model, pick a model from the dropdown. Leave it empty to fall back to the system default.
- If the selected model supports reasoning, toggle High reasoning by default to start new chats with high reasoning enabled.
Creating your first AI agent
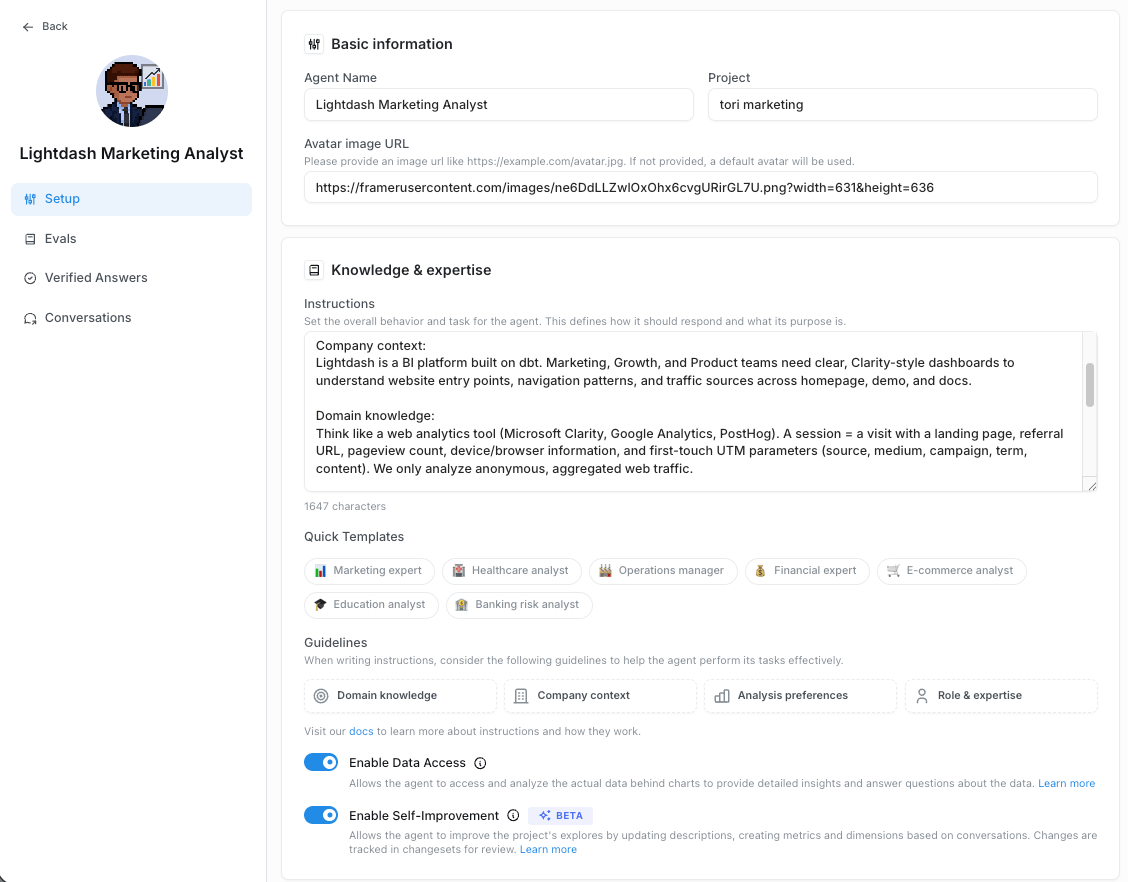
Go to Ask AI
This will be your entry point to working with the AI agent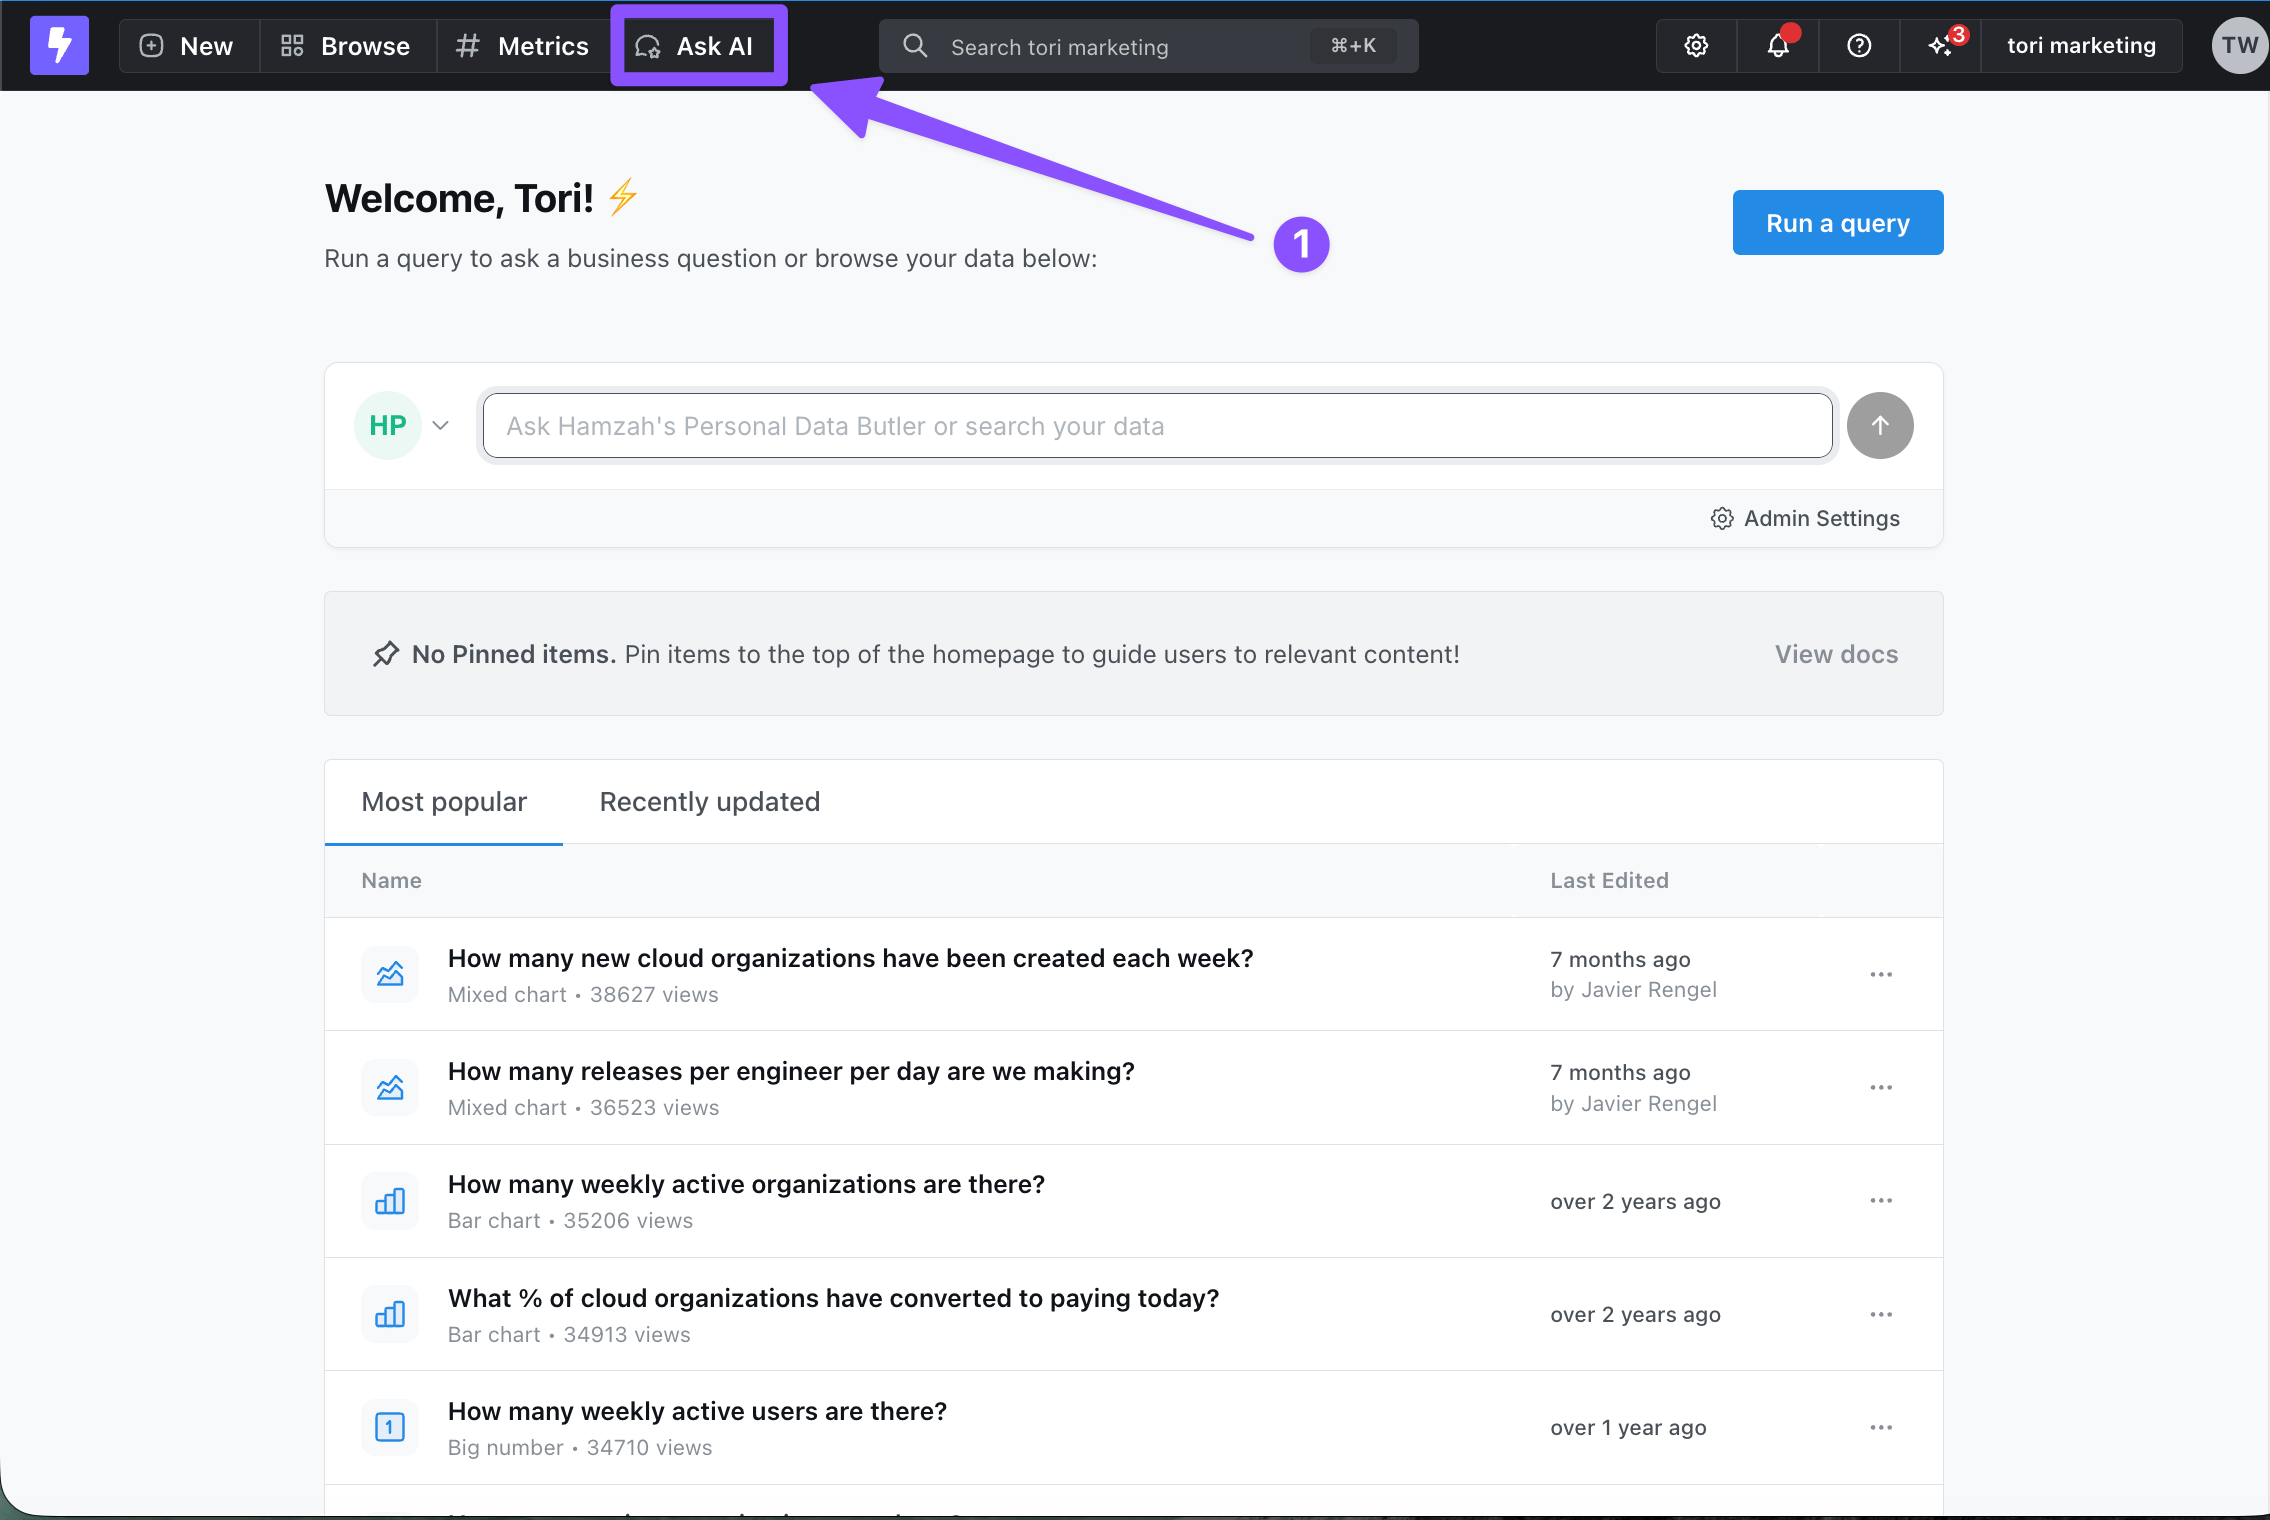
Create a new agent
Go to the agent dropdown and click Create new agent at the bottom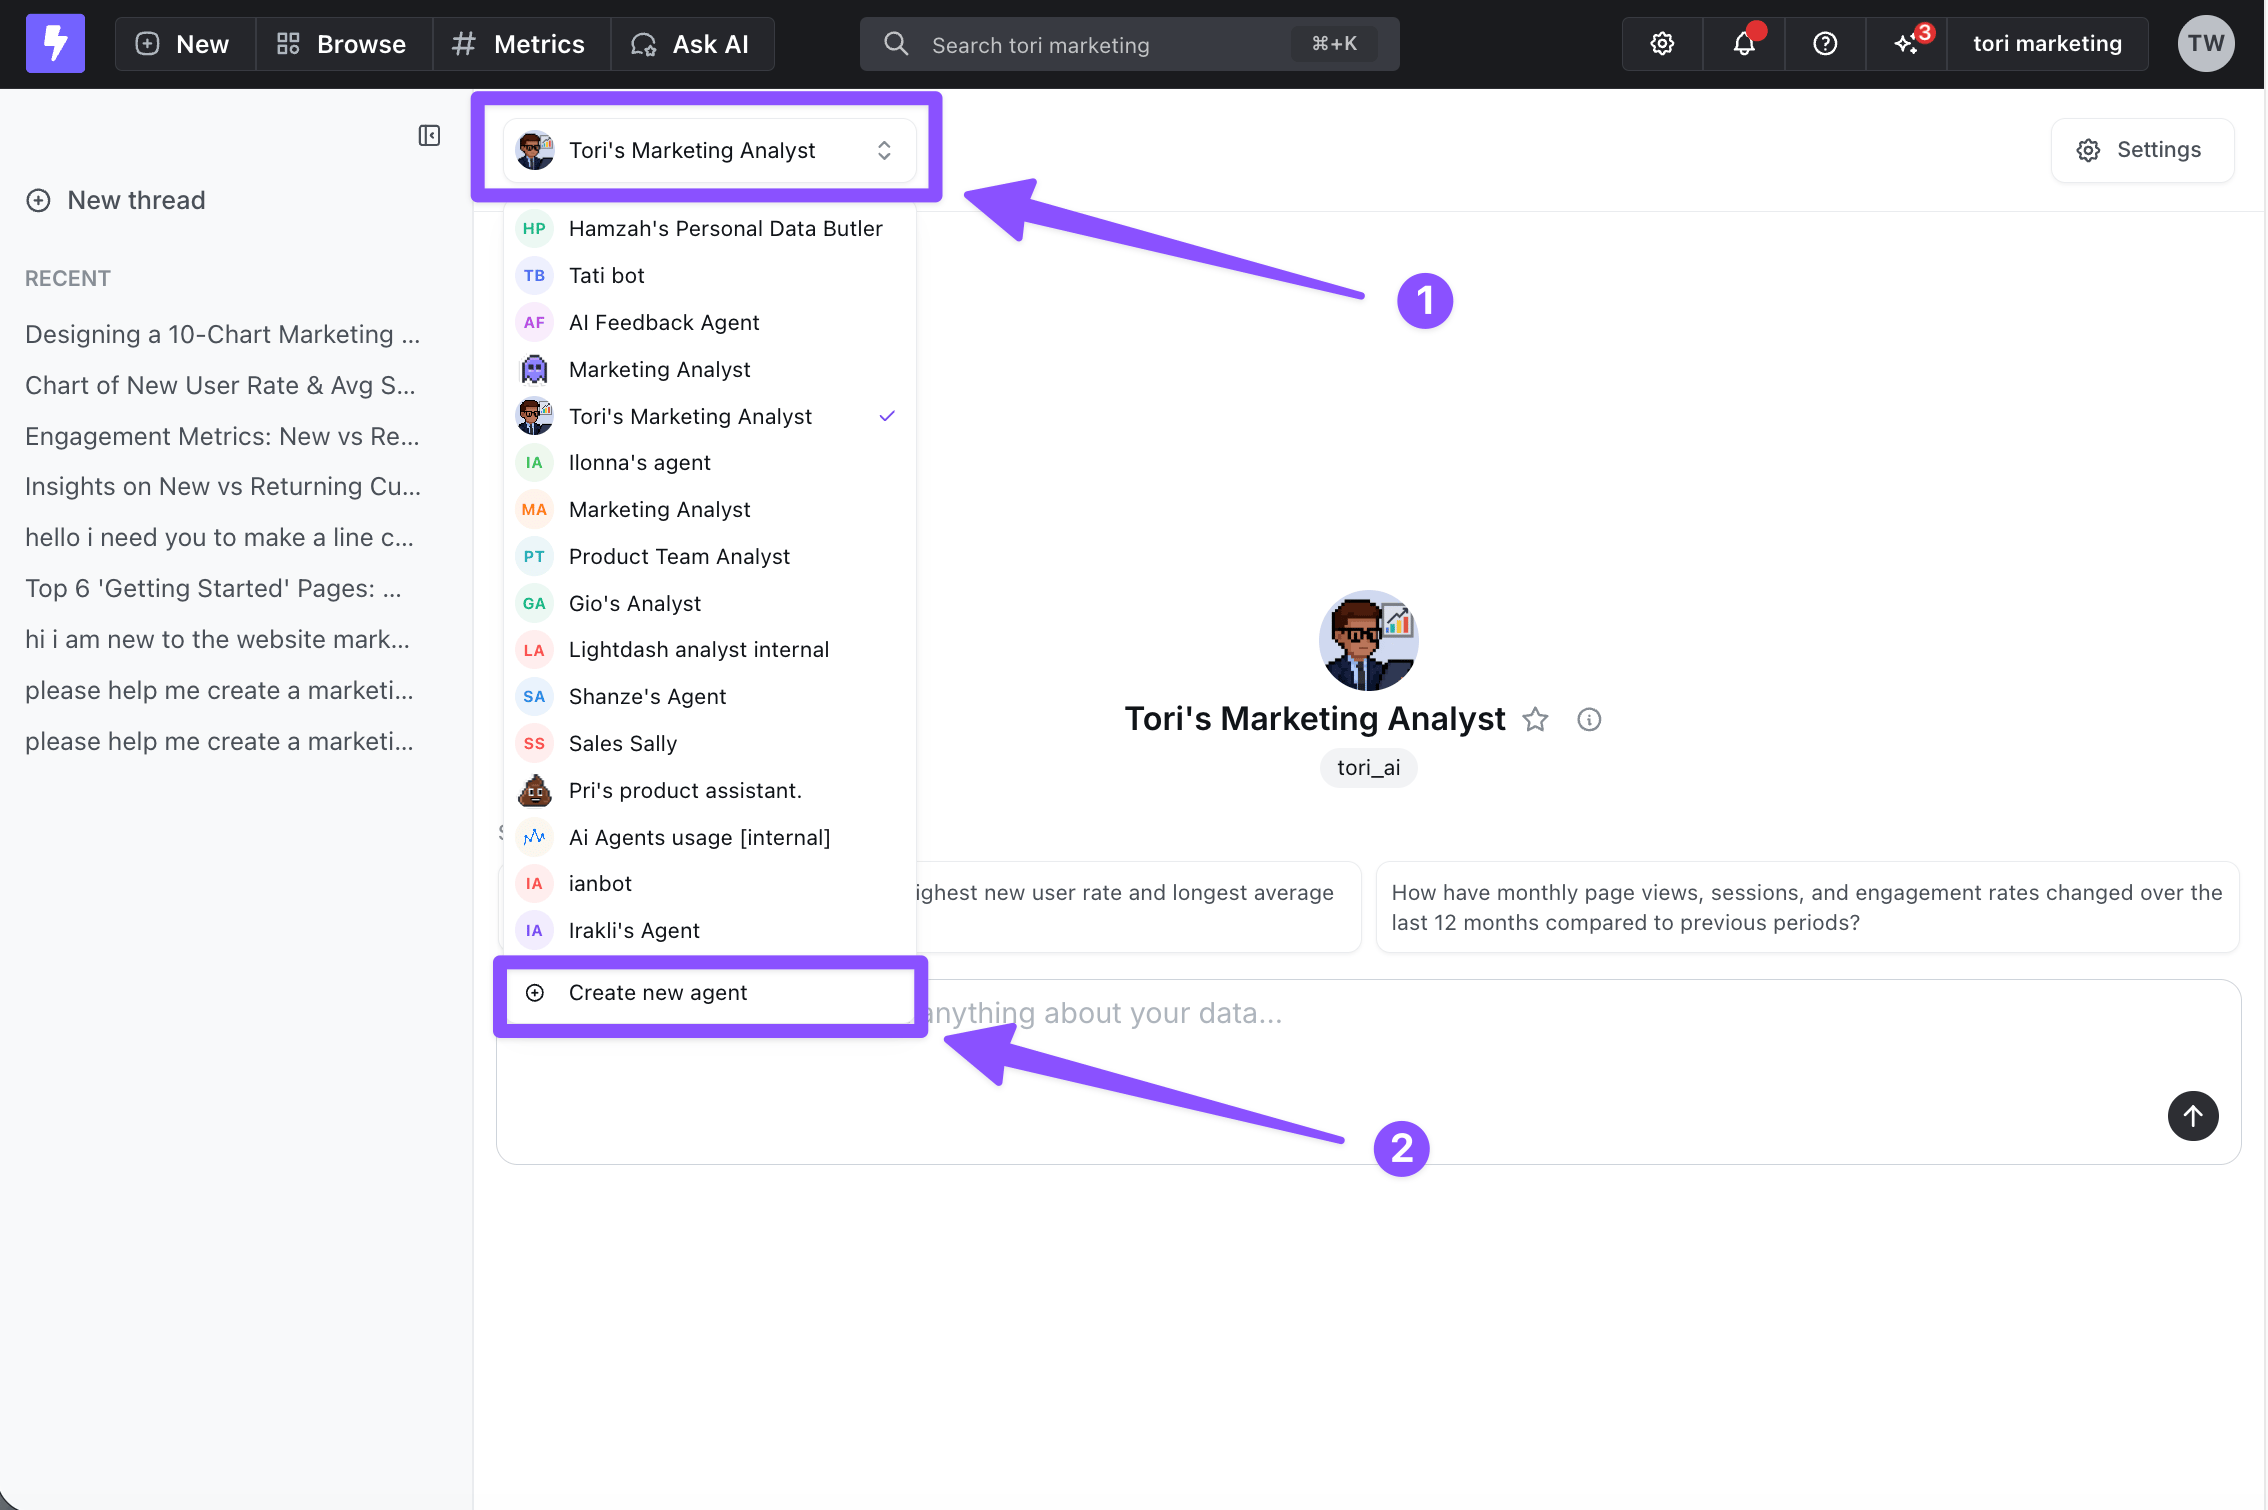
Configure your agent
Name and image
Give your agent a memorable name and visual identityInstructions
Provide context to guide your agent’s reasoning and ensure responses match your expectations. Your instructions can include any of the following components. Each one helps the agent understand your data, your business, and how you want insights delivered:- Domain knowledge - Describe the industry or subject area the AI should think within. Include relevant terminology, methodologies, frameworks, and technical concepts.
- Company context - Explain the business background behind your analysis. Add details about your goals, product, target audience, strategy, or any constraints that influence how insights should be generated.
- Analysis preferences - Clarify how you want the AI to approach analysis. Specify preferred metrics, dimensions, chart types, visualization styles, and reporting formats so results match your expectations.
- Role & expertise - Tell the AI what role it should adopt (e.g., “Senior Marketing Analyst”). Include the communication style, depth of explanation, and level of decision-making authority you expect.
Default model (optional)
Choose the default model and reasoning setting used for new chats with this agent. Leave the model empty to inherit the organization default. Lightdash resolves the model for a new chat in this order:- The user’s per-chat selection
- The agent’s default model
- The organization default model
- The system default
Knowledge documents (optional)
Upload reference material — glossaries, metric definitions, business context, internal SOPs — that your agent can consult while answering questions. Use this for the kind of context that doesn’t fit neatly into a dbtai_hint or your instructions. See knowledge documents best practices for guidance on what to upload.
Data Access
By default, agents have data access enabled so they can analyze actual query results and provide insights based on the data. You can turn it off per agent if you want metadata-only behavior. This section also holds the Pass user information toggle, which lets the agent tailor answers to who is asking. Learn more in data access control.User and Group Access (optional)
By default, your agent is available to everyone in the project. While you’re still setting it up, you can keep it to admins and developers only, then open it up — to everyone, or to specific users and groups — once it’s ready. You’ll find these options under the agent’s access settings. This controls who can use the agent, which is separate from data access control (what data the agent can query).Tags (optional)
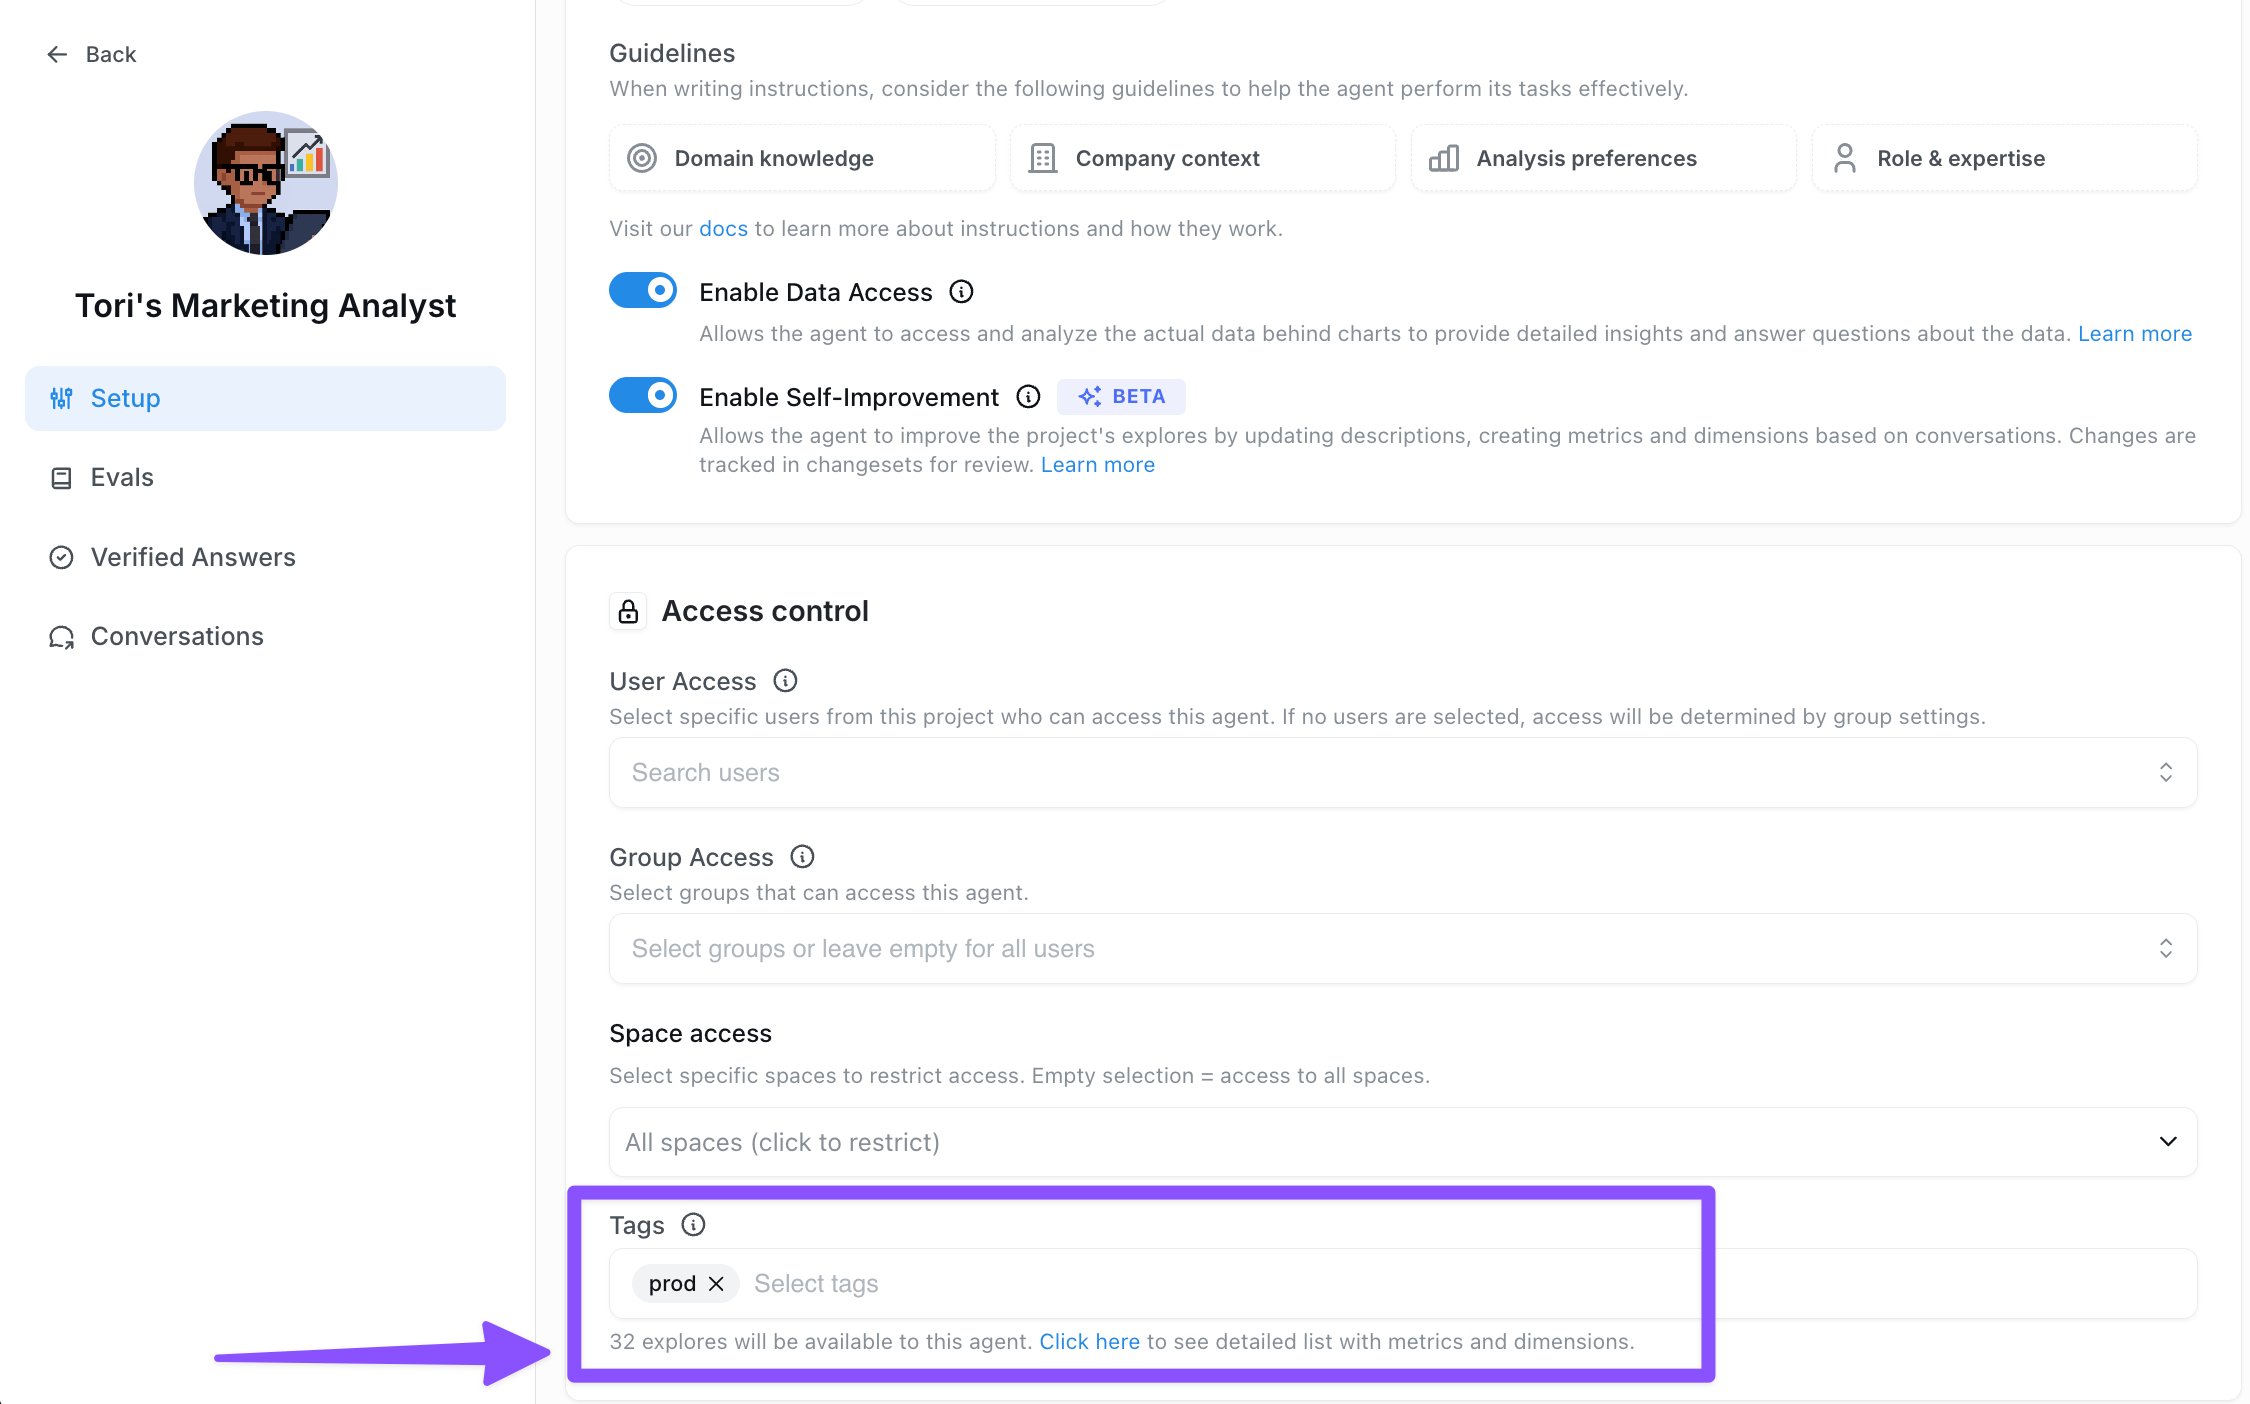
Use tags in the Lightdash metadata to control which metrics and dimensions the agent can access. Tags help you restrict your agent to a specific slice of your semantic layer.- Tag your dbt model dimensions and metrics with the tags you want - your agent will only have access to those dimensions or metrics that have matching tags.
View code examples
View code examples
- Add the corresponding tags to your agent settings under the Tags field. This tells the agent which tagged dimensions and metrics it should access.
- For more technical users who want to configure tagging rules in more detail - including how tags interact with permissions and schema visibility - see the Data access control section.
Enable AI writeback (optional, Beta)
Allow your agent to edit your dbt project from chat — renaming metrics, adding dimensions, or updating descriptions — and open a pull request with the changes for review. Read more on the AI writeback (beta) feature.Setting up multiple agents
You can create multiple AI agents, each configured for different tasks, tones, languages, or teams. Each agent can have access to different datasets to focus results and give more accurate answers.Slack Integration
Connect your agent to Slack channels so users can interact directly from Slack. Check out all the cool ways to integrate your agent into slack here- Add Slack to your organization in organization settings. An admin needs to complete this step. See the how-to guide.
- Add the desired slack channel to your agent integration settings.
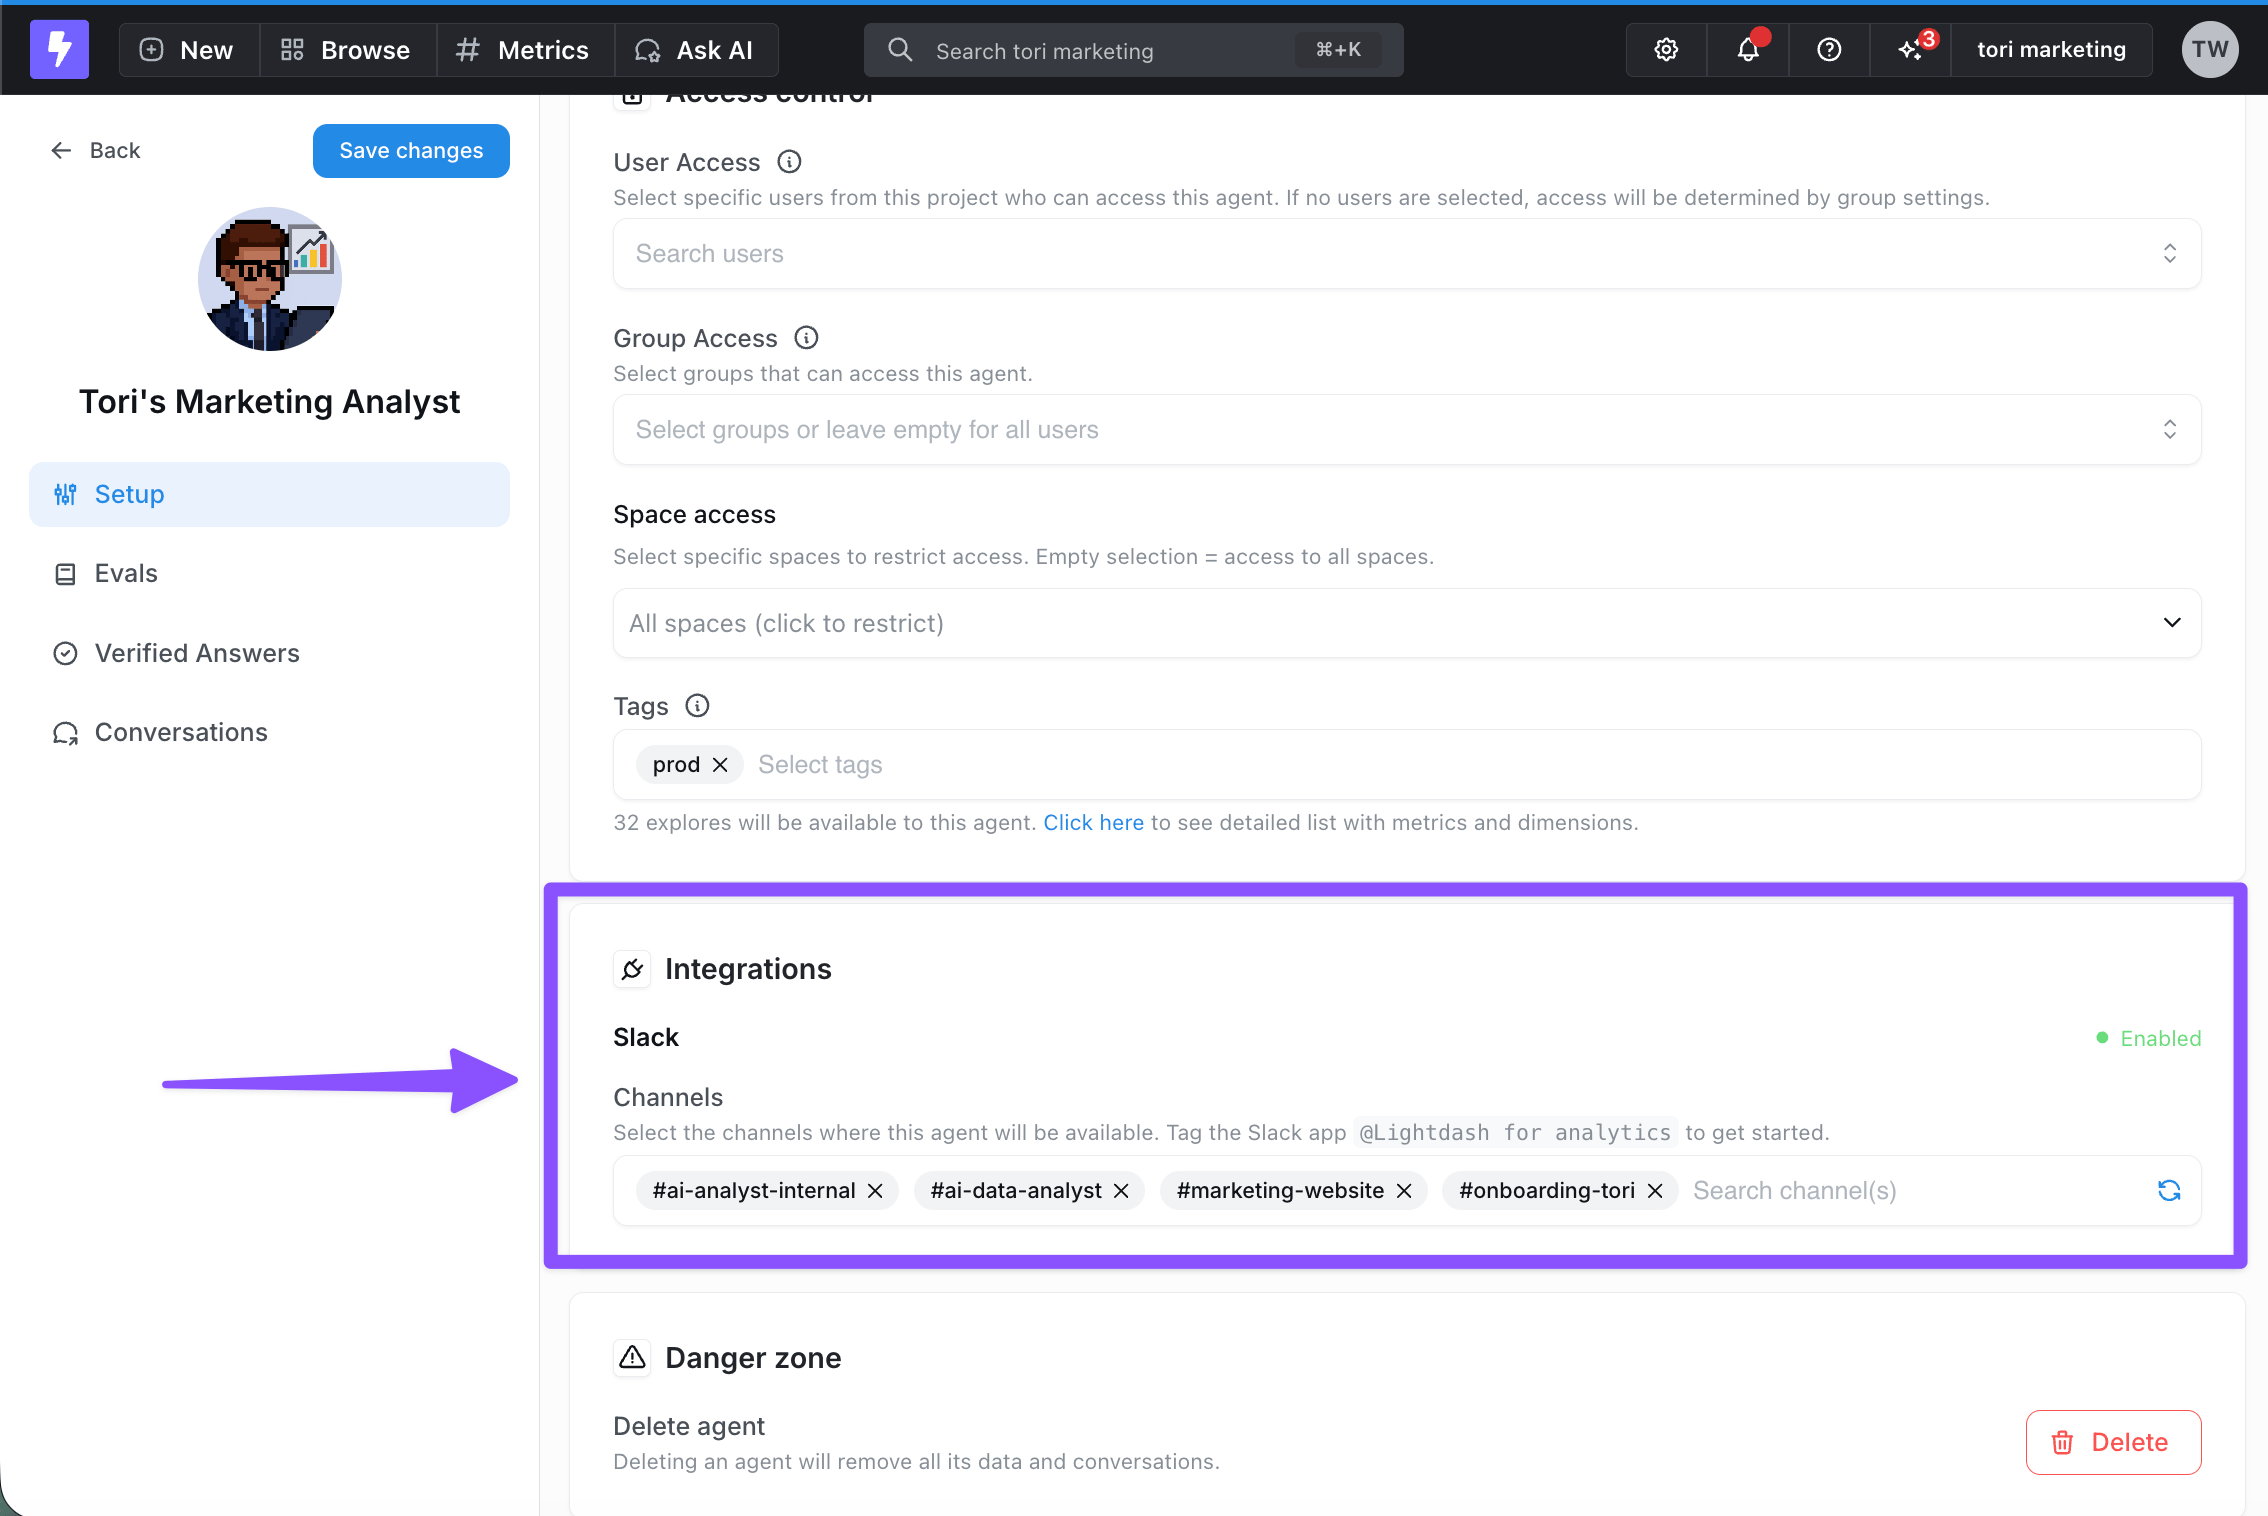
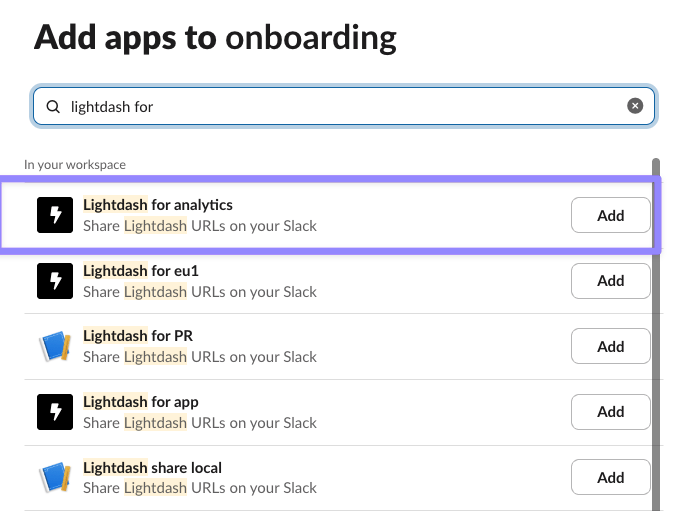
- Add the
Lightdash for analyticsapp to your desired slack channel by going to #channel —> Edit settings —> Integrations:
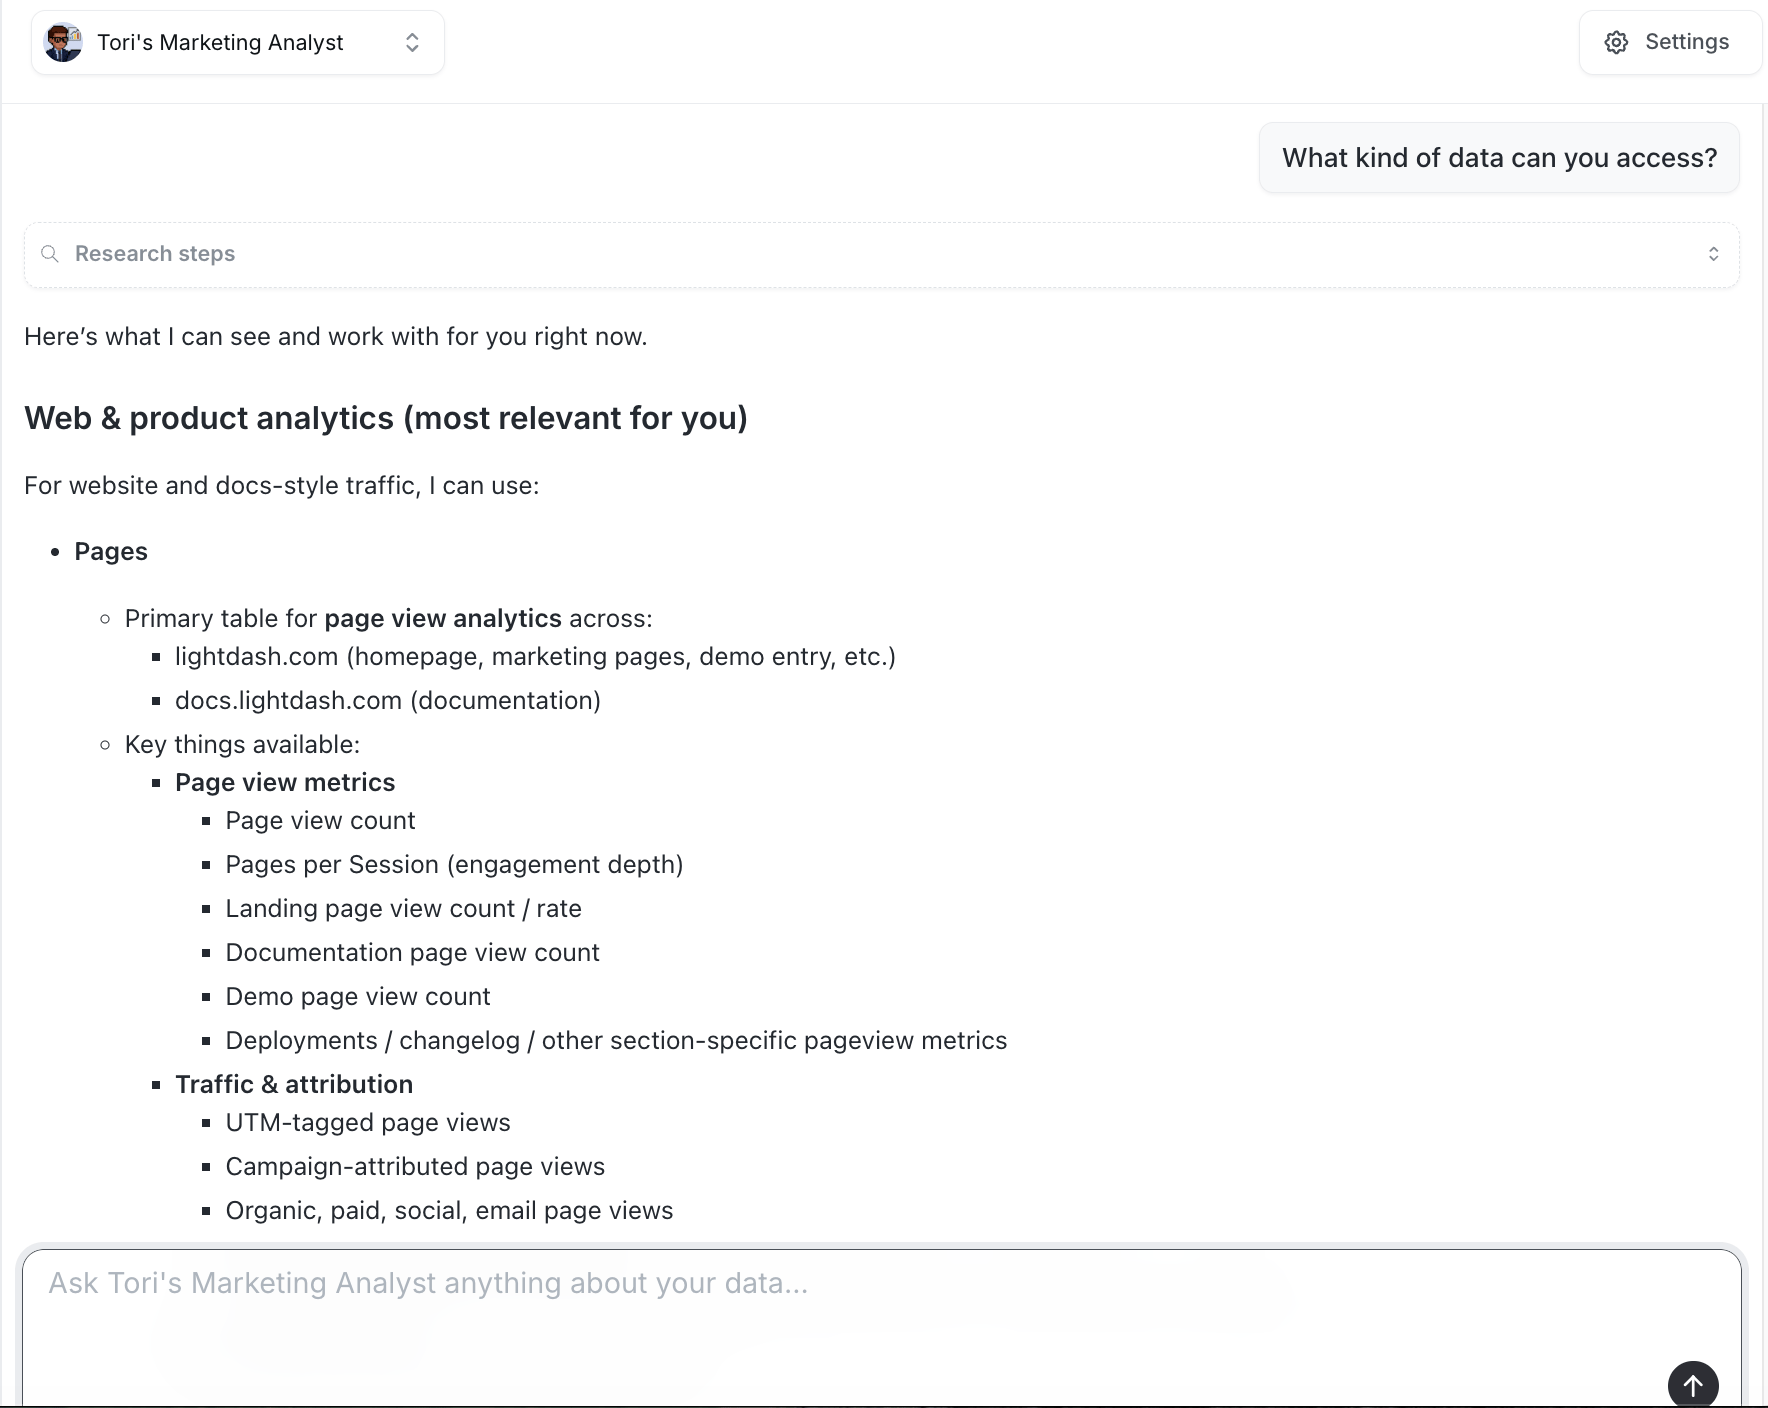
- Now you can interact with your AI agent in slack just as you would in the Lightdash UI. Start asking questions like “What kind of data can you access?” or “Show me total order amount over time”.

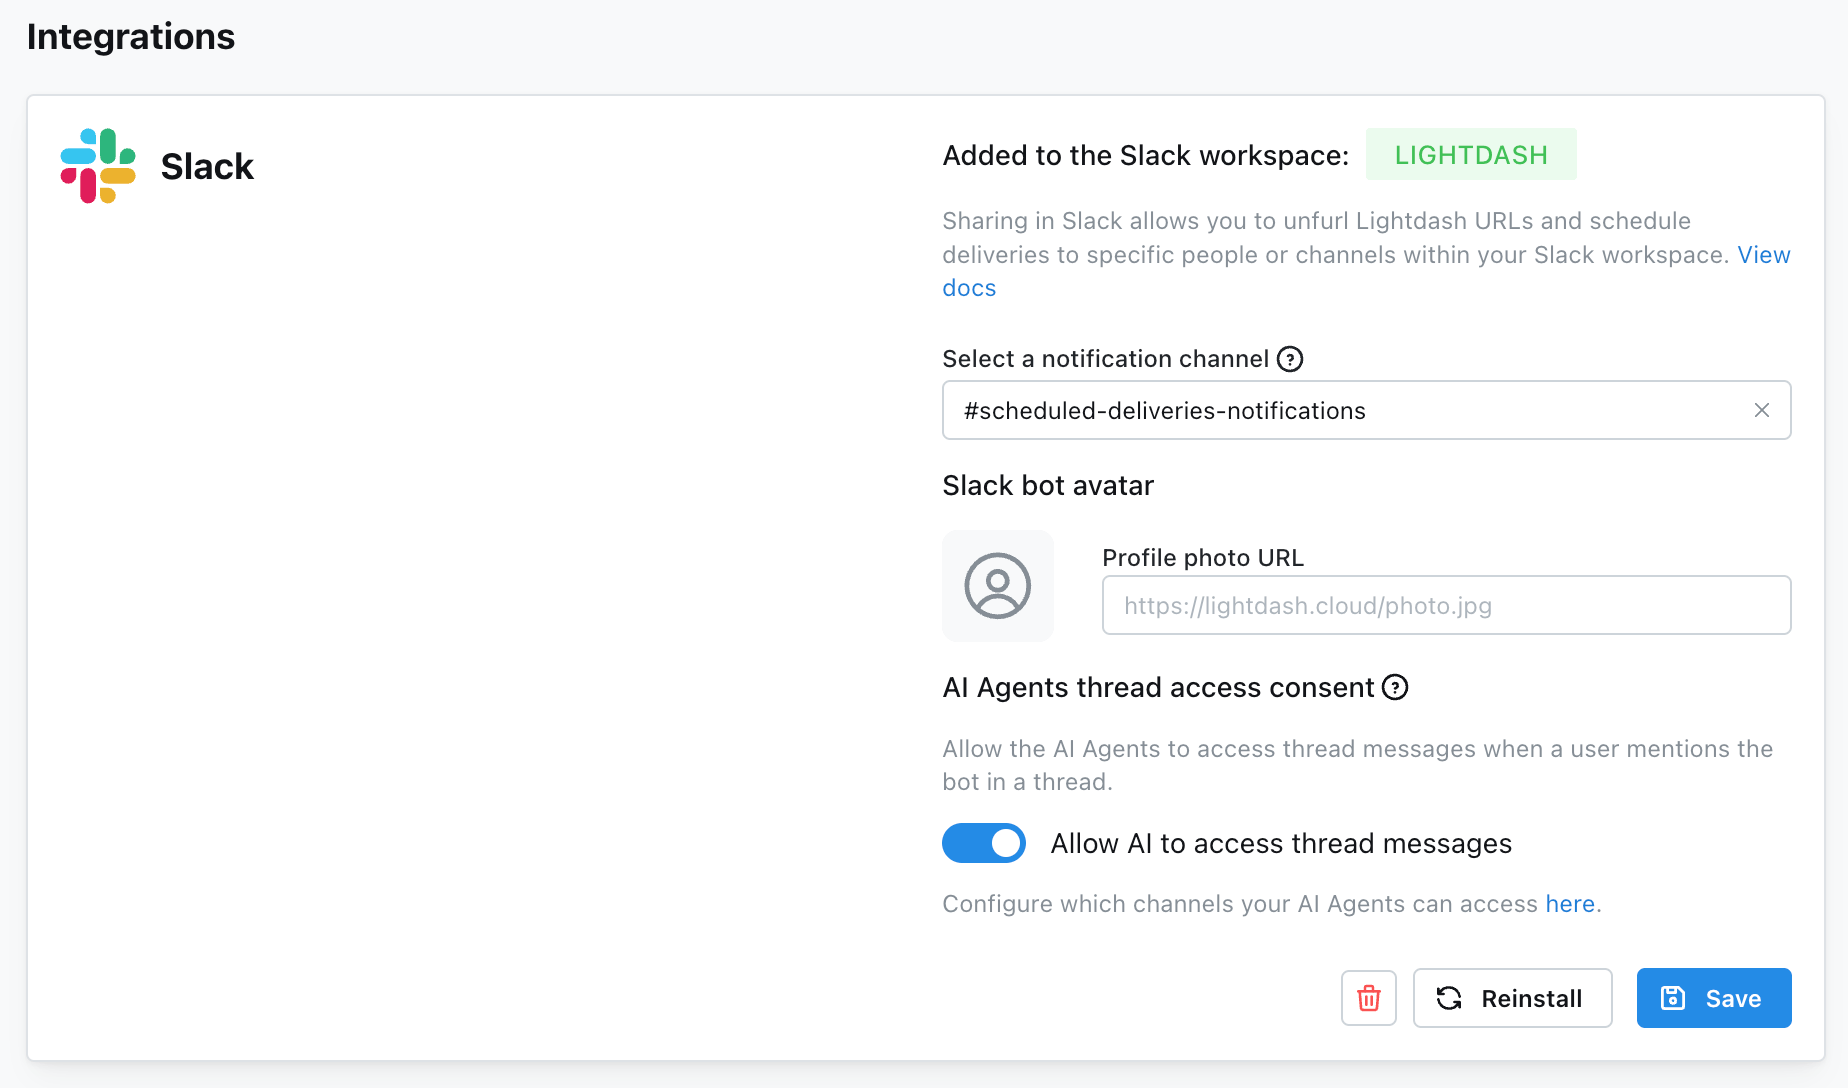
- You can also summon the bot on a thread to continue the conversation. In order for the bot to be able to respond, you need to enable this context sharing in your Lightdash Integrations settings.
Once you’re set up - whether in the UI or in Slack - you can start asking questions immediately! Try asking “What kind of data can you access?” to get started:
Slack channels: single-agent vs. multi-agent
By default, each AI agent can only be connected to one Slack channel. If you try to configure two agents in the same Slack channel via the per-agent integration path, you’ll receive an error. If you want multiple agents in the same channel, set up a multi-agent channel at the organization level instead. In a multi-agent channel, you don’t pick which agent to talk to — you interact with the single Lightdash Slack app and the AI Router automatically picks the best-fit agent for each question. How you interact with the app depends on where you’re posting:- New message in the multi-agent channel — no
@mentionneeded. Lightdash picks up the message automatically and routes it to the best-fit agent. - Reply in an existing thread —
@mentionthe Lightdash Slack app. Without the mention, Lightdash will not respond in-thread.
Setting up a multi-agent Slack channel
Multi-agent channels are configured at the organization level, not per-agent:- Go to Organization Settings → Integrations → Slack
- Find the Multi-agent channel setting in the AI Agents configuration panel
- Select the Slack channel you want to designate as the multi-agent channel
- Click Save
Linking an agent from Slack
You don’t have to go to the Lightdash UI to connect an agent to a Slack channel. When someone@mentions the Lightdash app in a channel that has no agent configured, Lightdash offers to link one right in the thread:
- One manageable agent — Lightdash auto-links it to the channel, confirms the link in-thread, and then answers the original question in the same turn.
- Multiple manageable agents — Lightdash posts an in-thread picker showing every agent the user can manage (labeled by agent and project). Selecting one links it to the channel and processes the original question.
- No manageable agents — Lightdash posts an ephemeral message asking the user to contact an admin, with a deep link to the AI agents page.
manage:AiAgent on any org agent, they see the “ask an admin” message instead of a picker.
“Manageable agent” means an agent the invoking Slack user has permission to edit. If they lack manage permission on every agent (or aren’t linked to a Lightdash account yet), no channel binding is created.
Turning off automatic channel linking
For organizations with stricter data governance requirements, you can require that channels only be added from the agent settings UI and never from Slack. This turns the configured channel list into a strict allowlist. To disable auto-linking:- Go to Organization Settings → Integrations → Slack
- Under the AI Agents configuration panel, turn off Enable automatic channel linking
- Click Save
@mentioningthe bot in an unconfigured channel posts an ephemeral message pointing to the AI agents page instead of auto-linking or offering the picker.- Adding and removing channels from the agent settings page continues to work exactly as before.
- Existing channel links are unaffected — this only controls new links created from Slack.